(To see an updated version of this post go to:
Here I am just finishing the wall up. It is a full 14" wide.
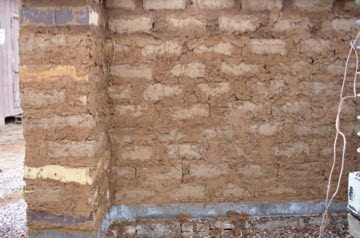
The adobes are all in place. Notice the gringo blocks on the right end of the wall. They are scrap 2x4's nailed to the width of the wall in a rectangle and filled with mud. The frame for the gate will be lag bolted to the gringo blocks. This wall is all about recycling. The foundation is 2' deep and loose filled with old concrete rubble and stone from previous projects. What you see at the very bottom is a row of old concrete from a walk we tore up in the course of remodeling. Nice not to carry this stuff to the dump. On top of that is a 6" pour of new concrete with rebar to hold everything together. The footer is essentially at the top of the foundation. This allows the free flow of moisture underground and can even be used in conjunction with a french drain. In this case it helps to prevent winter moisture build up next to the adjacent north wall of the house. One last advantage is that it prevents water from wicking up through a conventional concrete foundation and compromising the adobe. The dirt for bricks, mortar and plaster is from a pile that had accumulated over the years from digging footers and crawl spaces and gardening.
The common approach to laying adobes is to leave voids in the adobe mud mortar for the plaster to key into. I do just the opposite. I fill between the bricks very tightly with a margin trowel. Compression is the name of the game with most masonry work, adobe included.That is the glue that holds everything together. Also I use a very thick mud mortar between the bricks as I figure mortar is easier than making bricks. With mortar you mix it and put it on the wall where as making bricks is a multi step process. I use lots of straw in my bricks, in the mud mortar, and in the mud plaster. After the mud is dry I take an old plaster trowel and scape the wall to remove any loose mortar.
This is my set up for mixing adobe plaster. I do not screen for making bricks or mixing mortar (usually you can just pick out rocks and debris) but plaster dirt must be screened, in this case 1/4" wire mesh (the screen is hiding behind the saw horse between the wheelbarrow and the sand). The pile of dirt that I used for bricks, mortar, and plaster is beyond the screen. In this case I had to mix in washed plaster sand to keep the plaster from cracking. I won't go into how to determine ratios at this time. I do not add sand for the bricks or mortar. When I have water in my rain barrels I use that for mixing. Careful attention should be paid to your site layout as minimizing movement saves time and energy. This is incredibly hard work. Don't make any harder than you have to.
Here I am applying the plaster. At the request of the new owners we changed the cap and they are now planning on changing this arrangement back to the corrugated metal style on the other walls.
Some old scrap timbers make a nice window detail.
This gives a nice detail of the old concrete I was able to use up as part of the wall.
This was taken from inside the house after the new owners had settled in.
In the right half of of this photo is the section of wall you saw in the 4th photo from the top. Remember the gringo blocks? You may notice the stop for the gate bolted into the now invisible blocks.
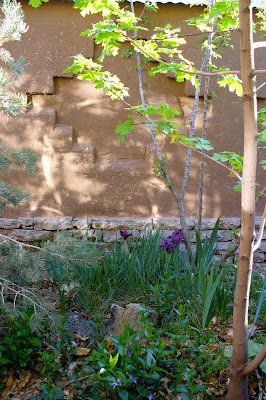
These insets were made by simply turning the 10"x14" bricks from the 14" width to the 10" leaving a 2" inset on each side. They require a specific layout with lots of advance planning but are worth the extra work. Notice the straw appearing out of the plaster from repeated rain. Also at the bottom you can see where the plaster is damp. This is the plaster that is covering the concrete footer. It is always good to start your adobe high enough to avoid any moisture damage.


